


A Filipino Breakfast Part I: Beef Tapa

Happy belated new year everyone, and welcome to the first Modern Rustic post of 2024! I spent New Year’s and most of January traveling to the Philippines, Thailand, Singapore, and Japan, followed by a couple weeks of recovering from jetlag. I trust you've been busy yourself, but thanks for bearing with me during this posting hiatus. I intend for today’s post to be the first of many this year.
I’m excited to kick off 2024 with a topic inspired by my recent travels: Filipino cooking. Now, I am not Filipino, but ten years ago I married one, and I’ve been happily eating and learning to cook Filipino food ever since. There are a ton of wonderful Filipino dishes to explore, but today we’re going to start with silog, the Filipino meal I make most often.
Silog is a type of Filipino breakfast that includes sinangang, or garlic fried rice, and itlog, which just means egg in Tagalog. The egg is fried, and the meal is usually served with a protein. This base of garlic rice and eggs is simple, flavorful, and comforting – a perfect way to start your day when you need a substantial breakfast.
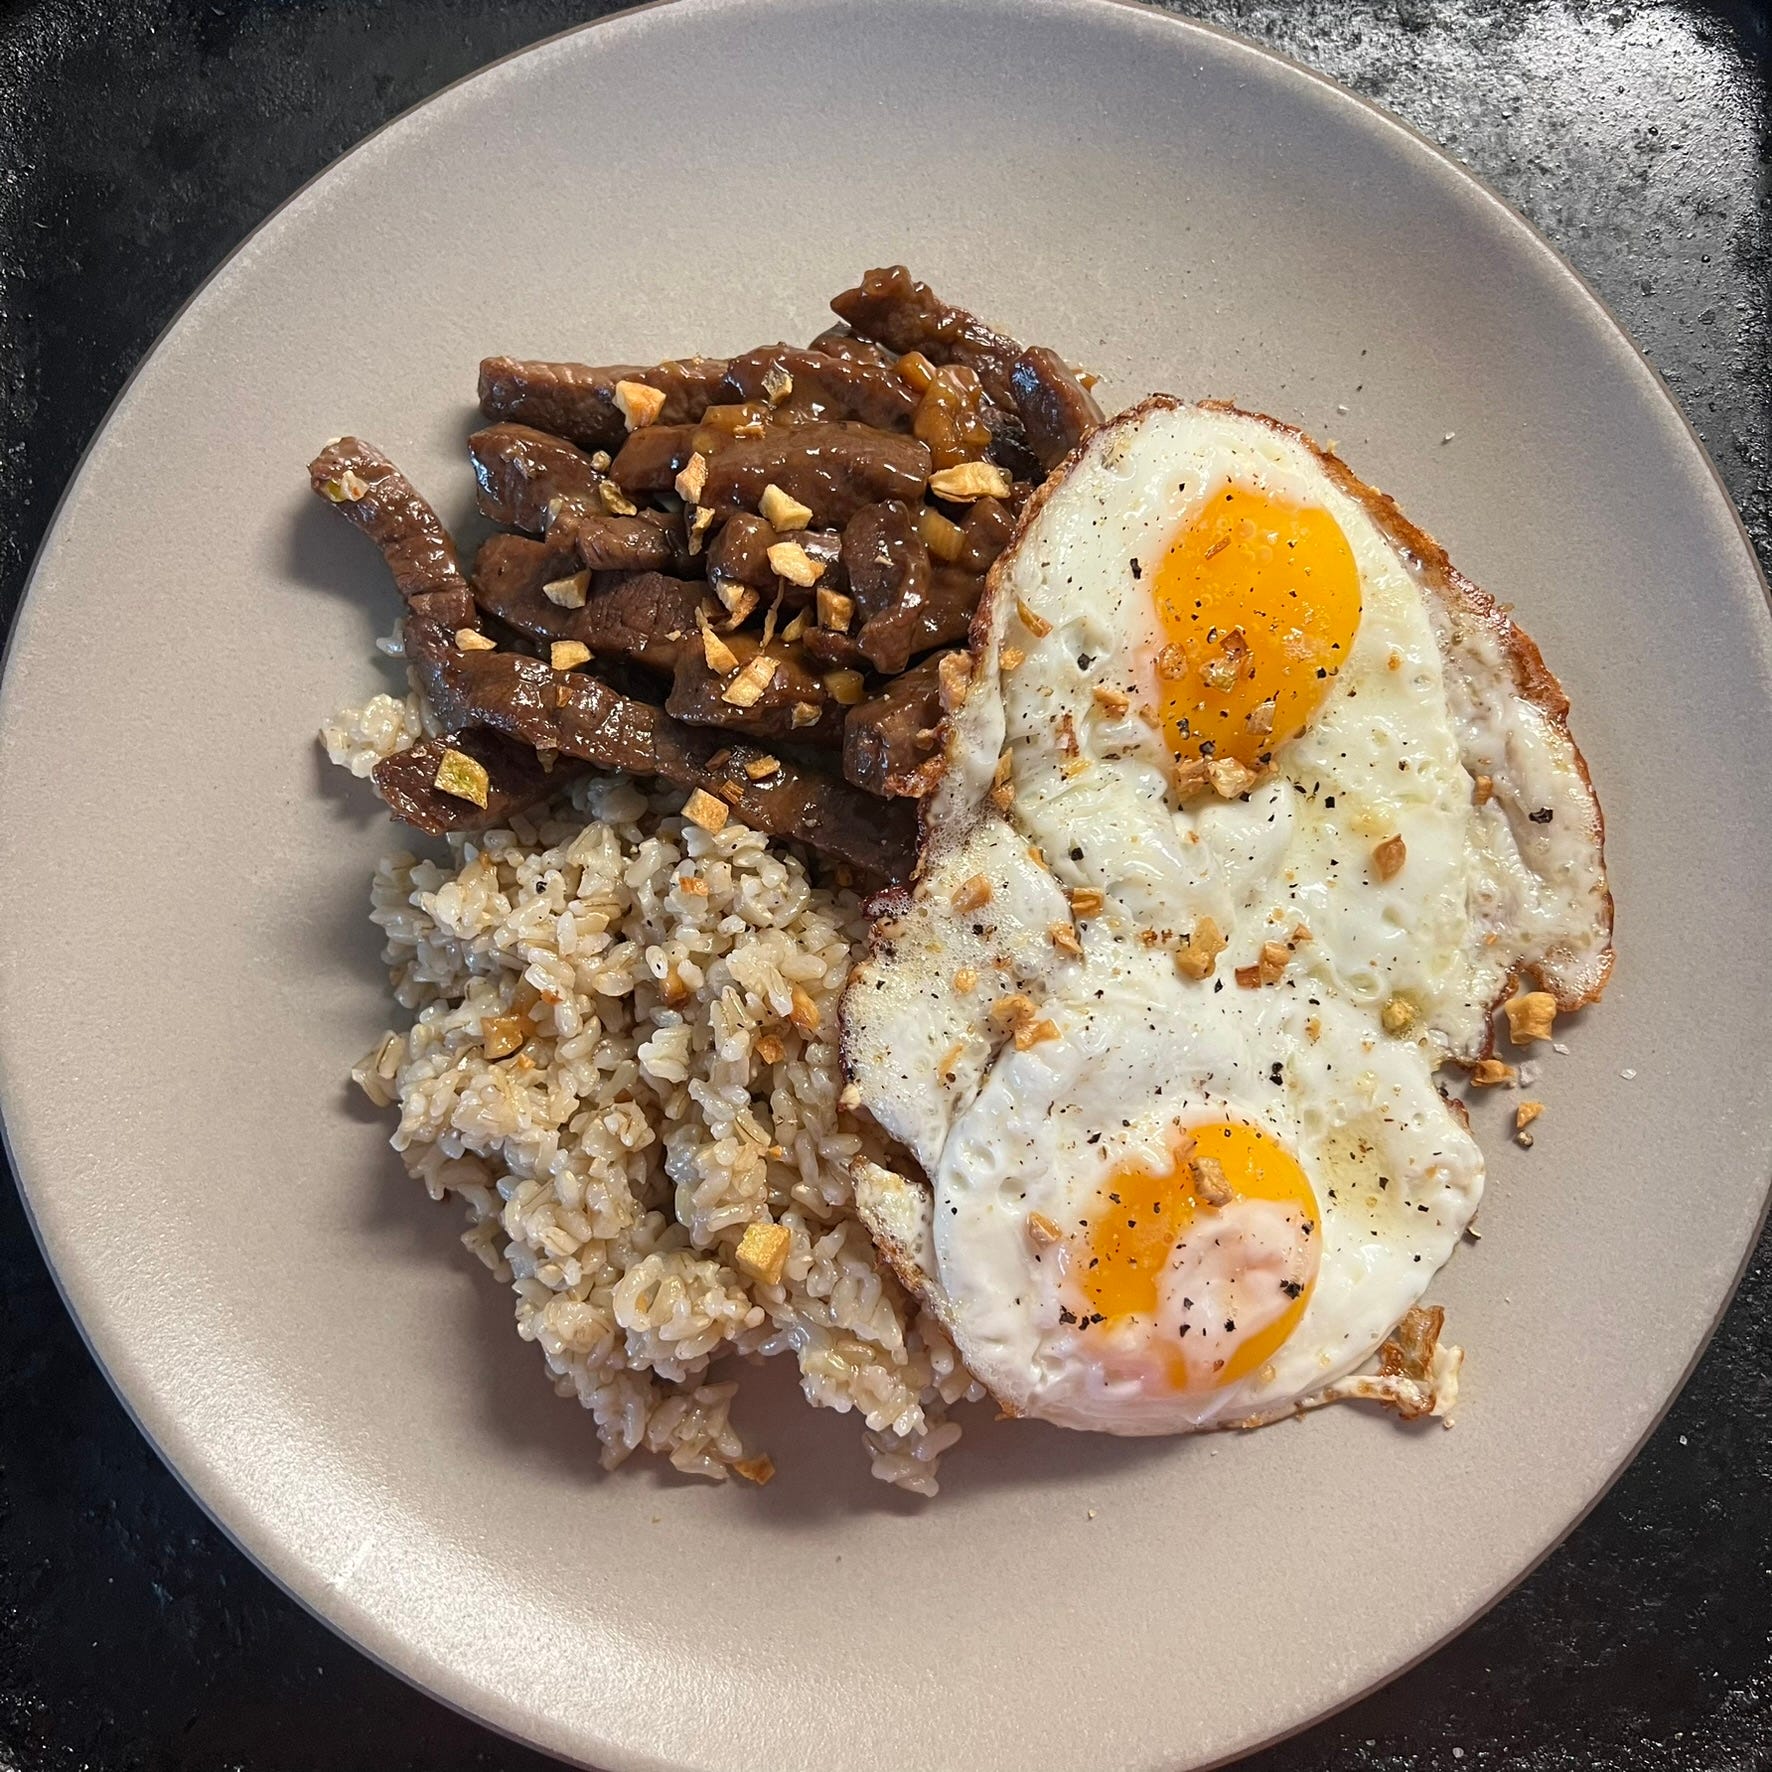
Once we’ve mastered the rice and eggs, we’re going to build on that base to make tapsilog. Tapsilog is silog served with beef tapa, a marinated and pan fried beef dish that complements the crispy garlic and velvety egg yolk beautifully. There are many more meat combinations that go with silog, and I’ve already got another one ready to share with you next week, but I think beef tapa is the best place to start. It’s classic, straightforward, and can be made with ingredients you probably have on hand.
The final touch is sawsawan, which literally means “dipping sauce”. We’re going to make one with a mixture of soy, vinegar, black pepper, and chili pepper.
All right, let’s make a Filipino breakfast for two!
Sinangang (Garlic Fried Rice)
Makes 2 servings
I learned early on in my marriage that no Filipino meal is considered complete without soft, fluffy white rice. It’s the cornerstone of this Filipino breakfast, and we’re just going to add in some crispy fried garlic.
You want to use short-grain jasmine rice for sinangang. While white rice traditional and recommended, a short-grain brown jasmine rice works well too, as you’ll note in some of my photos. If you’ve got leftover rice from last night’s dinner, this is a perfect way to use it.


Ingredients
4 Tbsp neutral cooking oil (canola, grapeseed, etc)
6-8 cloves of garlic, roughly chopped
2 cups cooked white jasmine rice
Kosher salt
Preparation
Fry the garlic. Chop your garlic roughly into small pieces. I like the pieces to be a bit larger than a mince and irregular so there’s some textural variation. Heat the oil in a pan over medium-low heat and add the garlic. Fry, stirring regularly, until light brown and crispy. Remove to a paper towel-lined container with a slotted spoon.
Fry the rice. Reserve 2 Tbsp of the garlicky oil for frying eggs, and heat the other 2 Tbsp over medium heat to fry your rice. You can either fry your rice in the same pan you used for the garlic or start a new one and use your garlic pan for frying eggs. Add the rice, and stir fry until warm.
Warming the rice will take 3-5 minutes if starting with leftover room temperature rice, and you can add a splash of water if it’s too dry. If you just made a fresh batch of rice and it’s still hot and moist, you can just fry it in the oil for a minute without any water.
Stir in garlic and season. Reserve a couple pinches of crispy fried garlic for garnish, and add the rest back to the rice. Stir it in, taste and adjust seasoning with kosher salt. You shouldn’t need much. Cover and set aside to keep warm while you finish the other components of the meal.
Itlog (Fried Egg)
Makes 2 servings
We’re not doing anything fancy here either, just making 2 perfect fried eggs per person. But making a perfect fried egg is serious business. It’s one of those things that isn’t complicated but is deceptively challenging to get right every time, especially since different people prefer different styles. So I’m going to share a couple of my favorite ways to make a fried egg here. Which one you like best comes down to personal preference.
Regardless of style, I use an 8-inch frying pan and cook two eggs at a time. Non-stick is helpful for methods 1-3 but not necessary if you’re experienced with a stainless steel pan. Stainless steel is preferred for method 4.


Ingredients
4 eggs
Butter or oil (for silog I like to use some of the garlicky oil from making sinangang above)
Sea salt
Ground black pepper
Preparation
Sunny Side Up Method. Heat ½ Tbsp of the garlicky oil from making sinangang in a non-stick frying pan over medium-low heat. Once the oil is shimmering, crack the eggs gently into the pan. Sprinkle sea salt and a few grinds of black pepper over the eggs. Cook for 2-3 minutes without flipping, until the white is fully cooked. You can pop a lid on the pan for 1 minute to help the top of the white cook through, or longer if you want the yolk to get a little less runny.
Over Easy Method. Follow the sunny side up method and then flip the eggs and cook the yolks for 30 seconds. The yolks should still be pretty runny, but the outside will be cooked.
Over Medium Method. Follow the sunny side up method and then flip the eggs and cook the yolks for 1 minute. The yolks should be jammy.
Crispy Egg Method. My favorite way of making fried eggs. Start by heating ¼ inch of oil over medium-high heat in a frying pan. You can use whatever you have left of the garlicky oil from making sinangang above and if necessary add a little more. When the oil is very hot but not smoking, crack the eggs into the pan. They’ll start to crackle immediately and the whites will bubble up, soon the edges will start to brown. Sprinkle salt and a few grinds of black pepper over the eggs. Once the edges are dark and crispy and you can slide a spatula under the eggs without sticking, they are done.
You will need to cut through the crispy bits to eat this style of egg, so if you’re making a dish that needs to have a soft texture throughout, then I’d stick with one of the above methods. Otherwise, I love the different textures and flavors that this method brings out. The yolk goes from set at the bottom to jammy in the middle to runny on top. I think it works great for silog.
A non-stick is ok for this but a stainless steel aluminum core pan or similar is more ideal for browning, and the egg should release on its own once it’s crisped up.
Sometimes I like to use a spoon to baste the yolks once or twice with the oil in the pan before removing, to just cook the tops of the yolks so they’re only slightly runny and mostly jammy. If you prefer a more runny yolk, skip this step.
Sawsawan (Dipping Sauce)
Makes 4 servings (1 Tbsp each)
Soy sauce and vinegar are two critically important ingredients in Filipino cooking and you’re basically just combining them to make this sauce. Sawsawan can also include minced garlic, tomatoes, and red onion, but I usually go with this simpler version that I can whip up in a few seconds. Datu Puti, a Filipino brand, makes ideal soy sauce and sugar cane vinegar for Filipino cooking, so grab it if you can, but it’s not required.
Ingredients
3 Tbsp Datu Puti cane vinegar (rice vinegar or distilled white vinegar are fine substitutes)
1 Tbsp Datu Puti soy sauce (or other brand of soy sauce)
Pinch or two of crushed red pepper, adjust for desired level of heat
Ground black pepper to taste
Preparation
Combine the ingredients. Put all the ingredients in a bowl or tupperware container and whisk or cover and shake to combine. Serve on the side as a dipping sauce.
Beef Tapa
Makes 4 servings (¼ lb each)
Beef tapa needs at least an hour of marinating, and then it’s quickly pan fried. It’s a simple and delicious protein to complete our Filipino breakfast of tapsilog. You can halve this recipe for two, but leftover beef tapa is not a bad thing.


Ingredients
3 Tbsp Datu Puti soy sauce (or other brand of soy sauce)
3 Tbsp Datu Puti cane vinegar or lime juice (If using vinegar, rice vinegar or distilled white vinegar can substitute)
1½ Tbsp sugar
6 cloves garlic, minced
¼ tsp ground black pepper
¼ tsp salt, to taste
1 lb beef sirloin, thinly sliced
2 Tbsp neutral cooking oil (canola, grapeseed, etc), for frying
Preparation
Make the marinade. Combine soy sauce, vinegar or lime juice, sugar, garlic, black pepper, and salt in a small bowl and whisk to combine until the sugar is dissolved.
Marinate the beef. Slice the beef into roughly ¼ inch pieces, and add to a container with a lid you can keep in the fridge. Pour the marinade over the beef and mix well to combine. Cover and put in the fridge for at least one hour and up to overnight.
Tender sirloin is best for this dish because it doesn’t cook for long. You could use flank or skirt steak or even tri-tip instead, but you might want to tenderize it first by pounding with a mallet.
You don’t want to marinate this for too long or the acid will start to break down the meat and give it an undesirable texture. Most recipes recommend marinating no longer than 24 hours. Since this is a breakfast dish I find marinating the beef at night to be ideal, then it’ll be well-seasoned for you by morning.
Cook the beef. Put a frying pan on the stovetop over medium heat, add the oil once it's hot and then add the beef along with ⅛ cup of its marinade. Cook, stirring occasionally, until the marinade reduces, and the meat browns in the remaining oil. Stir more frequently as the liquid evaporates to prevent burning, lowering the heat if needed. It’s done when the beef is browned and glazed with the almost-fully-reduced sauce. Serve immediately with garlic rice and fried eggs, and garnish with crispy garlic.
Make sure to take the beef out of the fridge a half hour before you’re going to fry it up so it can get to room temperature.
At first the beef will release more moisture but keep an eye on it once it starts to reduce because it will move fast towards the end.
I hope this week’s post inspires you to give Filipino cooking a shot! Next week, we’ll continue our Filipino breakfast journey with tocilog, featuring another one of my favorite dishes, pork tocino.
In the meantime, if you want to dive deeper into Filipino cooking, I highly recommend the cookbook I Am Filipino: And This is How We Cook by Nicole Ponseca and Miguel Trinidad. Try their chicken adobo for dinner and I promise you will not be disappointed.